September 26, 2011

Scentsy Love

Let me just tell you how I am thrilled by the simplest of things. I recently made my first Scentsy purchase from my wonderful sponsor, Cristin, at a party she hosted & I am LOVING it! I got this warmer to use in my hall bathroom. It's called Taro

It is prettier than I expected and is a pretty shade of dark gray. I limited myself to only two scents of the thousands (or so it seems) available. The one I have burning now is Honey Pear Cider.

It is heavenly

I am always leery of spicy, fall time scents because sometimes they can be over bearing. This one is perfect. I seriously can't tell you how much I love it. I keep moving it from room to room so I can enjoy it everywhere & I find myself walking by just to sniff the room! hahaha- I'm such a dork.

I've got my eye on a bunch of other things I want to order. But I will probably host a party in the next few months so I can get a bunch of it free. Can't wait!

Don't forget to check it out yourself, this stuff is awesome! Click HERE to check out the catalog or click on the ad on my right sidebar anytime!
You can order online through her website, or you can contact her about hosting your own party. Happy sniffing!

September 25, 2011

40% off sale!

 I'm moving stuff out to make room for more...40% off in my shoppe through the end of the month!!! (not including custom orders) So get out there & snatch this stuff up before it's gone!
Stop back by The Red Tulip Shoppe in October for brand new handmade crafts for fall and winter!
Click here to start shopping...it's not too early to think about Christmas gifts! :)
** Enter coupon code:   TRTS40   when you check out to receive this discount! ** 

September 20, 2011

Pumpkin Chocolate Chip Cookies


I posted on Facebook that I was making these, and I was mauled with people wanting the recipe. Hold your horses no longer, here it is!

These cookies are AMAZING people. They have just the right amount of pumpkin-chocolate-spices-fall time goodness ratio.
They are really soft (even after storage for a while- and by a while I mean maybe a week, only because that's as long as they last around here before they are devoured!) and have an almost cake-like consistency. This recipe makes a TON too, so you can share the love with others (or just be selfish & gobble them up yourself) :)

I have taken a combination of recipes and created my own to make what I think is the best version. We make them year-round because my family loves them so much. If you're going to do that though, stock up on pumpkin puree now while it is in season!

So lets get started! Here's what you will need:

2 sticks softened unsalted butter
1 C white sugar
1 C light brown sugar
2 eggs
1 tsp. vanilla
2 C pumpkin puree (most of the time I just use 1- 15oz. can, only 1 oz short)
3 C  A.P. flour
2 tsp. Baking Soda
1/2 tsp. salt
1 tsp. ground cinnamon
1/2 tsp. ground ginger
1/4 tsp. ground nutmeg
1/4 tsp. ground cloves (I did not have cloves on this particular day, so I simply replaced them with the same amount of Pumpkin Pie spice, which contains cloves. The world is still revolving, and the cookies still taste just as magnificent!)
2&3/4 C (or 1 and a half 12 oz. bags) Milk Chocolate chips
Cooking spray/oil for baking sheet

Preheat oven at 350 degrees F.

Use a mixer (Hand or stand, My kitchen is not fortunate enough to have been graced by a wonderful stand mixer, so I get by with my trusty ole hand mixer.) to mix softened butter until smooth.

Mix white and brown sugars, and add to butter a little bit at a time. It will be thick and sticky

Throw in eggs & beat, then add vanilla and pumpkin puree. It will look like this lovely mess once mixed

In a separate bowl, mix together flour, baking soda, salt, cinnamon, ginger, nutmeg, and cloves.

Add these dry ingredients to the batter in small amounts. The batter will get thick. Once completely incorporated, stir in chocolate chips.

If you are rebellious like me, you will now eat a bunch of this dough, despite what they say about raw egg consumption. I'm not condoning it necessarily, I'm just saying, I ate like 2 cookies worth of this stuff and I still lived to see another day.  :)

 Spray cookie sheets with cooking spray or rub with oil (or if you're fancy- use parchment paper). Scoop dough onto sheets with a spoon. You can make them as small or big daddy as you'd like, just make sure all cookies on that sheet are about the same size. That way they cook evenly & none burn.

Bake for 15 min. at 350 degrees, or until a little brown around edges. (As you can see, they do spread a little, but I just try to jam as many on a sheet as I can) :)

Let the cookies rest on cookie sheets for 2-3 min. TIME IT. The cookies will keep cooking on the sheets, so to prevent them from getting overcooked, only leave them on for 2-3 min, then move them to a cooling rack to...cool.

And there you have it! Your very own pumpkin chocolate chip cookies!

Here are a few tips that helped me along the way:

- When baking cookies, I have no less than 3 cookie sheets going at once. That way, one can be in the oven, one can be cooling and one can have the next batch ready to go on it. Then I keep rotating. That way, I always have a cool cookie sheet ready to go. (Using warm cookie sheets can cause cookies to spread & be weird cause they start cooking before they're in the oven.)

- You don't have to oil the sheets each time. After a time or two, you can run your finger along one & see if there is enough oil left. Chances are, there is.

- Store them in airtight containers. That way they stay soft forever. Make sure they are completely cooled before you store them though, or you may end up with soggy cookies that stick to one another when you stack them.
- Stock up on pumpkin. Pumpkin puree (or as I call it- canned pumpkin) is a seasonal item at most stores. If you are going to want these in February or June, you may just be out of luck!

- Cookies are best followed by a big glass of milk & a nap
Enjoy!

Partying HERE & here !

September 17, 2011

Difficult questions- Life & Loss

I caught myself by surprise the other day. I was presented with a question that I used to struggle to answer. Over the last year, it's become a little bit easier, until the other day.

It was something I didn't even think about, and once it was out of my mouth I thought, "Why on earth did I say that?" It was no big deal, we went on about our day, but I still am wondering about my reasoning as to why that was my answer in the moment. I've never answered that way. 

I was subbing at a school here in town & was on the playground with my 3rd grade class for the day. A girl walked up to me who wasn't interested in playing. I've found that most little girls that age like to stand around with each other and talk, practice cheerleading, and make up dances. (Did I ever do that? I cannot remember for the life of me, but judging by my tomboy past, I don't think I did.)
She asked, "Do you have a son or a daughter?"
"Yes." I replied. I've answered that way to students before, and they usually just take that answer, and run off to what they had previously been doing. But she continued,
"How old is he?"

"7.5 months old."

It just came out. I don't know why I answered like that. I just kind of froze. I guess maybe, I just always picture him being the 7.5 month old who left me to go play in heaven. But I've never answered that question like that. It felt weird.

You see, right after Isaac died, that was a question we instantly had trouble with. Jon had a new job with a new church, we were moving to a new town, meeting new people who were always ready with the question, "Do you have children?"

In the first few months after he passed, we automatically answered "Yes." But it made us feel like we had to explain where he was, which made the askers very uncomfortable, or feeling guilty that they even asked. It didn't usually make us feel uncomfortable, but it made us feel bad when we made other people feel that way. The last thing I wanted was to make people feel weird, I was trying to make friends in this new place after all!

So, Jon & I talked, and we decided to come up with a plan. If the people asking were people who were going to be in our lives regularly, we would tell them the truth. Afterall, it would only be more uncomfortable later down the road to deal with dancing around the question.
And if they were acquaintances in passing, we would say, "Not right now." That's the only way we felt we could tell the truth without feeling bad. And it was the truth, he isn't with us at the moment, but we do have a son.

That's one of the hardest parts about making that decision. We didn't want to say no & pretend he never existed. He very much did exist, and he changed our lives. He touched a lot of lives in fact, not just ours. We didn't want to discount such a meaningful part of us. But, we also got tired of being the "Debbie Downers" of our conversations. So far, it's seemed to work for us.

It's something you might not think about after first losing a child, until it happens for the first time. But I think it's important to figure out a plan in order to ease the pain and worry when meeting new people. After all, it's not law, you can change it up whenever you feel like it.
I guess that's kind of what I did the other day.

A dear, and wise friend gave me a piece of advice when I was in the midst of dark times on this journey. I try to pass it on to as many parents who have also lost children, as it was a game changer for me. 

In summary, it is this: you make your own rules during this time. Don't be worried about what others will think or expect. Make your own rules. This is one time in your life when it is necessary to be a little selfish, in order to give yourself time to heal such a gaping wound.
This idea has freed me so much. I can't express enough how much her advice has meant to me.

So in this situation, I tell myself this: who cares why I answered like that. There is probably no deep meaning behind it, it's what was on my heart and tongue at the time. I won't apologize for it, or feel weird for saying it.

It is a tough question, and one I will have to deal with the rest of my life.
Even if we have children in the future, will I feel the desire to add Isaac to my number of kids count? I don't know, I'll cross that bridge when I get there.

In the mean time, I will embrace the fact that God gave me the opportunity to be the mother to a beautiful child who had some special difficulties, and was made perfect at the gates of heaven. Although, he was always perfect to me.

For those of you who are on this same journey, how do you answer such a difficult question?

September 13, 2011

Red River Gorge...and a trip down proposal memory lane

This past weekend we took some time to get away with a couple friends of ours. It was just for one night, but it was just what we needed. It was wonderful to be in the woods, away from email, school, work, and the technology that drains our time. We loaded up on groceries and headed out of town.

Thankfully, the husbands agreed to make this a "luxury" camping trip for us girls. (i.e. a bath house, not a hole you dig; a tent, not hammocks or shelters; cooking actual meals, not eating dehydrated MRE's; and I didn't have to carry all our belongings in a pack on my back) I feel so lucky.

We set up camp, and unloaded our things. This was my home for the night
Believe me, this is a huge step up from the other tent we have, which is a just a tarp-like shelter (can we say open to every bug?!) I was forced to had the opportunity to sleep in it one other time. Not. A. Fan. But this one, I can stand.

Unfortunately, we arrived a little later than we had hoped, so by the time we got everything set up and dinner started, it was dark & I couldn't really take any pictures. So you won't get a picture of the awesome hobo meals we made. I'll post about them some other time. They are AWESOME!

We enjoyed time hangin out around the campfire (I hacked my first log with a hatchet! Rawr! Muscles.) What is it about a fire that is so enticing? I can't think of much else, other than a puppy, or a baby that is more fun to just mindlessly stare at all night & yet, still be entertained! Anyone with me?

One thing we did NOT enjoy was when we went to get into our tent for the night: there were ticks EVERYWHERE! They were all over the tents, and the ground around. I have never seen anything like it. I was sure I'd wake up to a tick covered body in the morning.
I've had ticks before, and in some unsightly places mind you (Shannon, Danielle...remember? Or are you trying to block that from your memory?) :) So needless to say, I was itching & paranoid the entire night.

**I am excited to announce, I have yet to find a tick on my person!**

The next morning, my wonderful hubs chef'd it up and made us an awesome camp side breakfast with his grandfather's old Coleman stove
 And I helped by cutting potatoes and sipping on this. Mmm hot cocoa is a must when camping. And have you tried those giant campfire marshmallows?! They are huge! We used them the night before for s'mores, and then decided the hot cocoa needed one too.
 Look at that spread. Scrambled eggs, fried potatoes and bacon
 Then, as if that wasn't good enough, we wrapped them in tortillas & made them into breakfast tacos. I put my bacon in the taco & it was DELISH! I'm getting hungry thinking about it.
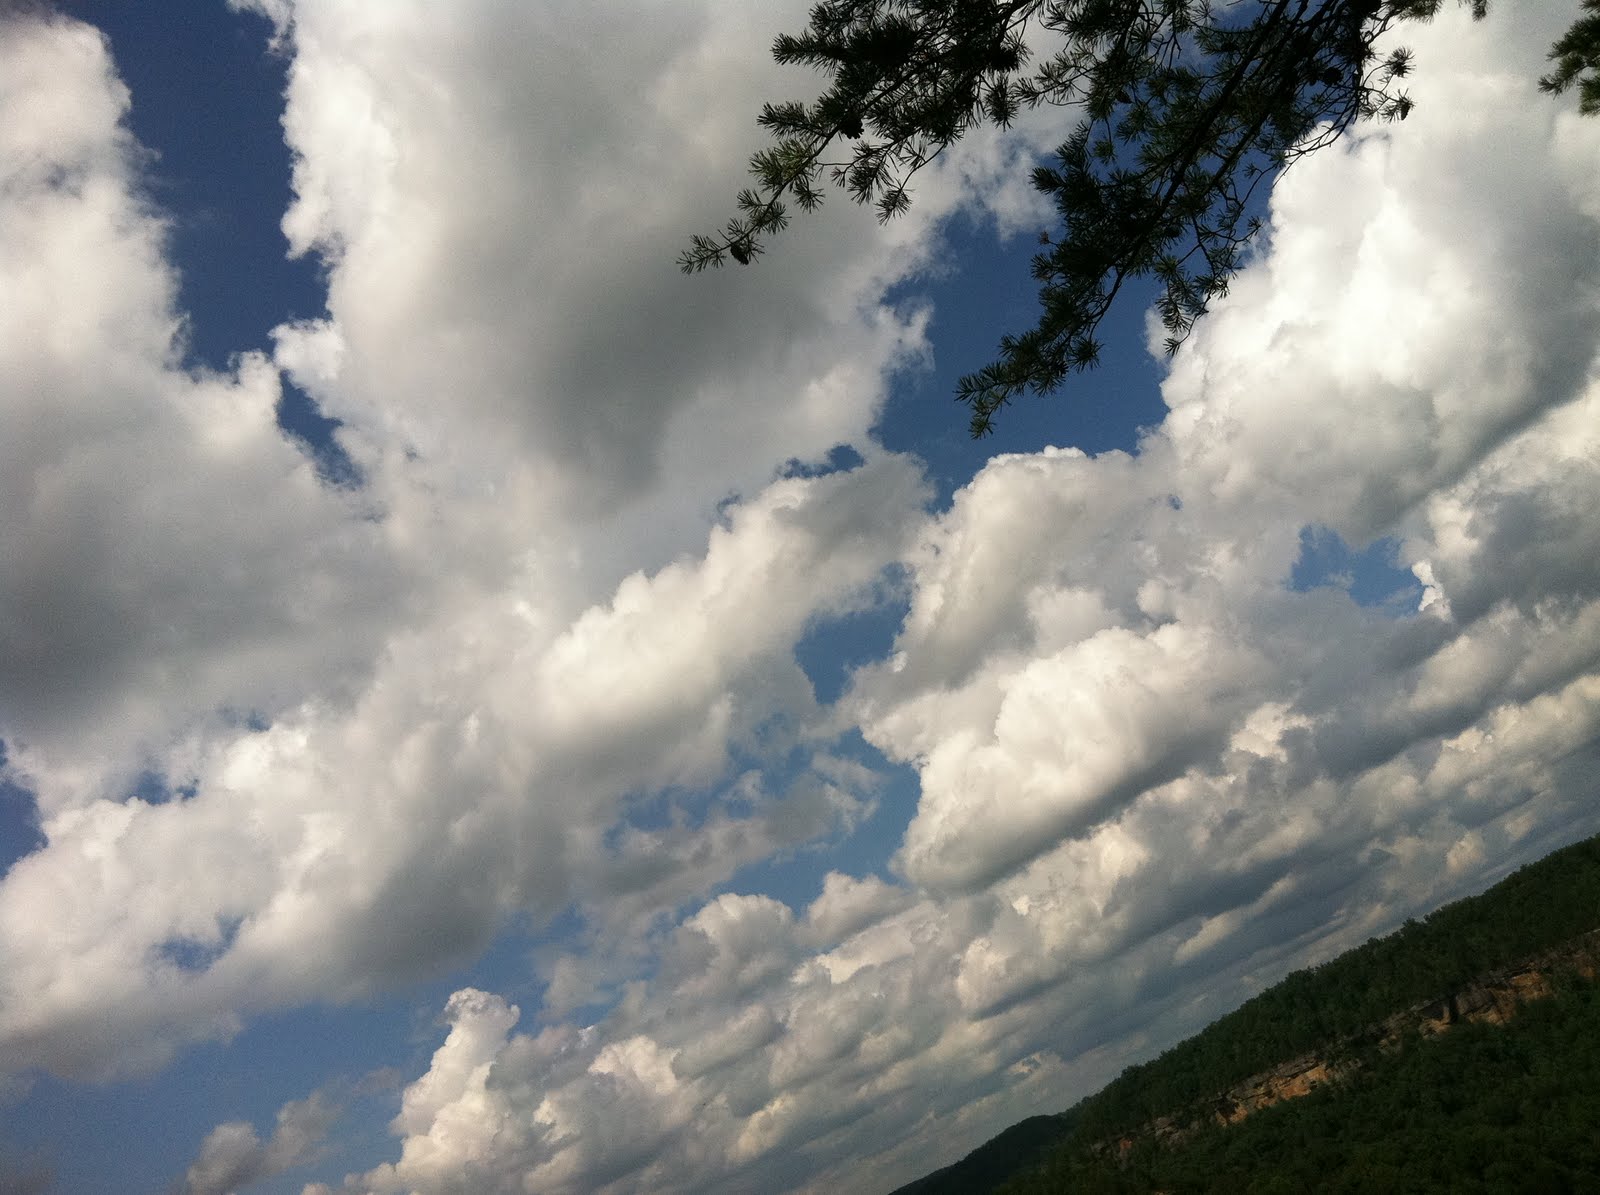
After we awoke from our food comas, we packed up camp & drove around the gorge a little. We took in some beautiful sights, and went on a couple short hikes. 
After having rain for 3 days straight, it was a delight to see the sun once again. It was a GORGEOUS day!

We even re-visited the sight where we were engaged over 7 years ago. Aww, such sweet memories. We love returning here & reminiscing.

Such a pretty overlook

He proposed on my birthday. After a day of hiking, we had a picnic dinner here on Chimney Rock. Then, at sunset, he got down on one knee & asked me to marry him.
**Although, sunset is relative. He's still bitter about the fact that it was overcast that day, which ruined his perfect sunset proposal plan. He will probably be bitter until his dying day. Me? I couldn't care less. I got the guy & the ring, that's all I cared about! :) **
I couldn't believe it, and after a few minutes of me crying & laughing, he said, "Can you answer, because my knee really hurts." Hahaha Obviously I said yes. It's just that after 4 years of dating, I'd played that moment out in my mind a million times, and expected it any time. So when it was actually happening, I couldn't believe it.

So cool to look down on trees for once. Such pretty sights. 

On our way back home we stopped at this place
We never take a trip to the gorge without visiting Miguels. It's this hippie, hole in the wall, pizza joint where all the climbers and gorge aficionados visit. It's kind of famous in that neck of the woods. But more importantly, the pizza is AMAZING. Probably the best I've ever had.

And just like that, our adventure was over. A short trip to the wilderness to help us unwind, relax, and remember that there's more to life than the busy-ness that tries to swallow us whole.
I hope you are able to take some time this week to stop & take in something you consider beautiful to remember what life is really all about.

September 11, 2011

Remembering


Has it really been 10 years? I can hardly believe it. I vividly remember that day ten years ago that it can't possibly have been that long.
I always remember when I was younger and my mom would recount every moment of the day JFK was assassinated. She always mentioned that even though she was only in elementary school, she would always vividly remember that day. I guess 9-11 is our generation's JFK.

I was a sophomore in college. My roommate religiously watched the Today show when she got up & ready. So, as I was getting ready to walk out the door for class, she told me something had happened. A plane crashed into a building in NYC. At that point, it was still too early to know anything. There was no new news, they just continuously showed the footage over and over. Myself and a lot of people thought it was just a freak accident at first...then the second plane. I started to get a little scared knowing this couldn't have just randomly happened twice. I had to get to class, but walked there in a sort of stupor.

I got to chemistry and we tried to go about our class. Being a Christian college, I remember our professor praying for the events that had occurred. Then, in the middle of lecture, the assistant came into the room, spoke quietly into my prof's ear, and walked out. She sat there in silence for a moment, then tearfully explained that the Pentagon had just been hit. She dismissed class.

I went to the student center where they had set up a TV in the foyer and people gathered around. We stood there and watched while we waited for our next class. For the rest of the day, there was a sense of fear on campus. When talks of terrorism began, we all worried about where we were. We were in south eastern KY, near Ft. Knox, an armory carrying many military weapons. Would it be attacked? What if they start attacking all over the country? What if we face nuclear terrorism? What will we do? When talk of fighting back began, we all worried about our friends and boyfriends as there was rumor of a draft being instated. Our minds ran wild with fear.

The rest of the day, our classes either didn't meet, or only met for a few moments while we prayed. We didn't know what else to do. I, like everyone else in the country, spent a lot of time in front of the t.v. waiting for any new information. My heart broke at the horrific things that unfolded, yet was proud at the way I watched our country be there for  one another. It was amazing really. When tragedy struck, we could have all been on the defense, letting fear and chaos rule. Instead, I heard stories of Americans giving what they had off their backs, helping strangers, and comforting one another. It really was a beautiful time, arising from such tragedy.

I pray that our country never knows another day like that. I pray too, that we always remember how we came together. We really got to see what God intended humans to be. A loving, compassionate, caring community. I pray for those who lost someone dear to them that day, that they will be comforted today. I am thankful for those workers who put their lives on the line that day, and always, to keep our country safe. And I thank God that even though we cannot put our trust and hope in this world, we can put our hope and trust in Him.
20 We put our hope in the Lord.
      He is our help and our shield.
 21 In him our hearts rejoice,
      for we trust in his holy name.
 22 Let your unfailing love surround us, Lord,
      for our hope is in you alone.
Psalm 33

Love, 

September 10, 2011

Thank you!

It has officially been a month since I started this here blog. I just want to thank all of you who read it, comment, subscribe, follow, and for all your kind compliments! You have blown me away and make me feel so loved. I have the sweetest readers!
I just want to give a shout out to these awesome blogs who were my top referring sites from the past month:


Check these out when you get some time!

We just got back from a camping trip with friends, and I am beat! I'll be back later with some great pics of our adventure! Hope the rest of your weekend is great!

Love,

September 9, 2011

Hang on Autumn, there's one more thing to decorate for!

As labor day rolled around, I thought, "Do I decorate for Labor Day? Am I supposed to put out a flag? What IS Labor Day anyway?" So I did a little digging (i.e. Googling). According to this rather official website, it is a, "National tribute to the contributions workers have made to the strength, prosperity, and well-being of our country." So well put! (Anyone else out there find it ironic that we celebrate our hard work ethic with a day off?) Anyway, I didn't end up putting out any patriotic decor, because I got sick and spent the weekend in bed and on the couch. yay.

Sad I missed getting to put anything out for Labor Day, I noticed our town being decorated with flags and banners for the tenth anniversary of 9/11. I decided this would be a great reason to decorate and show a little patriotism at the same time! So, I have put off my autumn decorating for a little bit, and got out some of the decorations I made for my 4th of July party.

I threw this party before I had my blog, so I'll share with you some really simple crafts you can quickly whip up in case you too want to put a little splash of patriotism out to honor the lives lost on that day.

First up: Star wreath

I got my idea from this gal, but I did mine a tad bit differently. 

I didn't have any special tools to do this, simply:
scrapbook paper (I found the regular weight- not card stock is easier to fold), 
a grapevine wreath and 
my hot glue gun. 
I don't have a cricut or silhouette machine (gasp! I know, I'm like the only one left in the world), so I found a star shape I liked on Google images and traced it onto some paper for my template. 

Then I traced and cut out each of the stars. Now for those of you who are lucky enough to have one of those machines, I'm jealous this process will go much faster.  But this method really wasn't that much work at all! I did it while sitting in front of an episode of Nate Berkus.
All you do is fold each point from the top point to the inside point, all the way around. You will start to see some of the folds stick out more prominently and some are pushed back. Now just slap some hot glue on those babies, and stick 'em to your wreath.
Voila! I just used a piece of coordinating yarn to hang it up.
It really makes a big impact for such a simple craft. I've gotten so many sweet compliments on mine.

Another option: Star garland
 I was so uncertain about this one before I tried it. I am, as I've mentioned before, a novice sewer. I had definitely not tried sewing with paper before. But this site had me confident I could do it. I'm so glad I tried it. If you can sew anything, you can sew paper! I used the same star template I used in the aforementioned wreath, and traced it onto more scrapbook paper (cardstock weight this time). 
 I picked the order I wanted my colors to go in, and just fed them right through the machine! (The only thing I did was change my tension- to the lowest setting, since I was working with such a fragile material.) In between each star, I just kept pressing my pedal for a half inch or so before I fed the next star. That's how I got the stringing effect between each star.
Seriously people EASY PEASY!!

And lastly: Streamer stick flags
I got my idea from here

All I did was buy cheap dowel rods, and red, white and blue streamers. When I cut my streamers to the length I wanted, I folded them in half lengthwise. This gives a little ruffly look to them. Then I literally taped them onto the dowel with clear packing tape & pounded them into the ground. 

My husband wasn't sure if he would like them, but totally changed his mind. They were almost a modern twist on displaying a "flag" without having those little plastic dollar store flags everywhere (Oh I had some of those too, but just a few) :)
Unfortunately, due to all the hullabaloo going on that day,  this was the only picture I got of the actual ones I made:
You can see them if you look close... with a magnifying glass. I think they would look absolutely charming if you and your neighbors put them up and down the street. So sweet, and SO easy to make. You could even get the kids in on it! 

So, there you have it. A completely random patriotic decor post in the middle of September! But all I know is, with all the media attention this time of year, my mind goes back to those people, and the families they left behind. And I also know the feeling of the rest of the world going on around you while you are frozen in time with grief, thinking no one cares or remembers. So, for that reason, I'll pay my own little tribute and hope my friends and neighbors don't think I'm a crazy lady who can't read a calendar :)
Partying HERE this week!

Love,

September 2, 2011

Pearl cluster necklace

 
 Voila! Remember the necklace I told you I wanted to make in a recent post? It came from this inspiration on my Pinterest "jewels" board. I was a little uncertain as to whether I could pull this off, but it was so easy! I am definitely adding jewelry to my repertoire. Not sure that I've mastered it well enough to add it to the shop, but I'll definitely be making myself some more pieces in the near future! I did hit a few bumps in the road, but nothing major. I'll share with you what I'll do differently next time, and how to prevent the problems I had, so you too can make your own jewels! Here's how:

First, you will need the following supplies:
Necklace chain *(more on this soon)
Pearl beads
Head pins (varying sizes)
Clasp with findings
Needle nose pliers
Wire cutters (NOT scissors! I know they are in the picture. Ignore that part of the picture. I later found they don't work near as well!)

Here are the head pins a little closer. I didn't know what they were until I started thinking about making my own jewelry. They look like a straight pin, but they are dull on the end. I bought a package of three different sizes, and used the small and medium size depending how small or big the pearls were.
 First, I put on my clasp and findings (the two circles on each side of the clasp). For the left finding, I simply pried it open it a little, looped it through the chain, then squeezed it closed with my pliers. For the right finding, I pried it open the same way, connected it to the chain, and also connected it to the clasp. Then, I squeezed it closed.

Next, you're ready to start adding pearls! Thread your headpin through the pearl (by the way, you'll want pearl beads with two openings so you can thread the pin) :)

Then, pick a hole on the chain where you want your pearl to go. For the first set of pearls, I placed one every three holes. 

Then, holding the pearl, start to bend your headpin over 90 degrees or a little more. 

Once you've done that, it's time for your pliers. Even though the headpins are really pliable, the pliers make this process much easier. I actually used them more to hold still the pearl and chain, and used my fingers to do most of the bending. 
Holding the headpin close to your pearl, bend the pin over the top of the pliers' nose like so:
Now, I made the loop big, so that you could better see the detail in the picture, but you will want to bend it tight around the nose of the pliers so your loop isn't so big.
You can stop there once the headpin meets itself at the base of the pearl, but I chose to give it an extra loop. I feel like it might be a little more secure this way. But I in no way, know if this is true or not. Do what you feel man! :)

Once my headpin met itself at the base of the pearl, I simply bent it around the base 360 degrees. You know, for that extra security.  :)
I did this for all the pearls. Like I said, at first, I added pearls every third hole. I added some to the right, then evened out the left. I found I am equally obsessed with symmetry in making jewelry as I am with plucking my eyebrows. But with my brows, I never feel like they look the same! So frustrating. Anyone else out there want to testify?! Sorry... 
I kept holding it up by the clasp to see how much further I wanted to add pearls. Once they went as far up the sides as I wanted, I started using different size pearls to fill in the blank spaces. Again, I held it up a lot in between until I felt like I had a finished product.  

Now, all I had to do was trim the headpin excess. See the extra long wires in the picture above? It does look kind of cool in my opinion, but I can imagine at the right angle, they might give a good poke!

This is where I learned a little lesson. I started out using my Cutco scissors, because they cut almost anything! They did cut the headpins, don't get me wrong, it just wasn't that easy. At one point I cut the entire necklace chain when I was trying to only cut the headpin. So, I had to put the necklace links back together.

That's when I noticed something on my pliers... not the rust, I already knew that was there... look closer
By George, is that what I think it is? There in the middle, near the hinge? Wire cutters? Why yes they are! Yippity skippity! I was so excited! Once I started using these puppies, it was like cutting through butter. I snipped right through all those extra wire ends. 

And there you have it! In just a couple hours you have a beautiful, handmade pearl cluster necklace!
This really is an easy project. I was even able to catch up on some television shows while I did this.


**Now, let me share with you some information that will make this process even easier. Don't buy a super cheap chain like I did. I got my chain from the clearance section at Walmart. I think I paid less than a dollar for a 6 foot chain. I used this same chain for some other projects I did, and it held up just fine.
But the little bit of tugging I did while adding the pearls would cause the chain links to come apart slightly causing the necklace to come apart. This happened to me about 25 times. It was an easy fix as I just used my hand dandy pliers to pinch them back together, but it was annoying nonetheless. Next time, I will purchase a little bit more sturdy chain, as I suggest you do too.

I have a bunch of materials left, and an old chain bracelet I don't wear anymore. I think I'll make a bracelet this time!
Have fun making your own pearl cluster necklace! You will be so pleased. Share with me when you do!
I'll be partying here, here & here this week!

Love,